Enough of this cheesy wedding stuff, back to the nit and
grit of boat ownership!
As promised, here is a [very] detailed account of our water
tank experiment thus far. Warning: this is a very long and rather technical
blog. This is not because I feel you are overstimulated or need a nap. This is
because the blogs of other boat owners have helped us tremendously with all of
our first-time boat parent worries. It’s a “pay it forward” thing.
If you don’t know boats and are bored enough to read on,
here is a boat glossary to help with some of the nonsensical words boat
owners use.
Last December, I came home to John taking a saw to the
inside of our boat, which I told you about
here. We pulled the seat apart,
cut up the water tank, dragged the pieces out of the boat, and then stood,
hands on hips, staring into a very dusty and oddly shaped hole. We scratched
our heads. This was going to be interesting.
We spent about a month with a useless gaping hole on the
left side of the boat while we researched and discussed various replacement
options. We measured and sketched and measured again. We got quotes from
steelworkers and plasticmakers. We got advice from all of our friends, whether
we asked for it or not. We decided what to do… Then we changed our minds. There
were 2 primary complicating factors for us:
1. we live very far away from the steelworkers and
plasticmakers and even the boat stores. Any prefabricated tank quote we had to
almost double because of shipping. Anything we made ourselves would have to be
meticulously planned out so we ordered all the right pieces in all the right
quantities. No quick dashes to home depot when you realize you don’t have the
right size paint brush…
2. Our tanks were put in place before they added the cabin
top to the boat, and are therefore larger than the companionway. If we had a
tank made, the dimensions would have to be
perfect to both fit through the door and maximize tankage
once in place. This was a daunting task (hence this somewhat arbitrary experiment). If we were, say, 2 inches off, we would have a lovely 7’ long
$2,000 hood ornament on our bow, and a very grumpy Becca.
 |
| Matt, pondering our water tank space |
|
|
|
|
With the help of our very patient friend, Matt (an
experienced sailor, boat builder, and good friend), we finally bit the bullet
and put in an order with fisheries for everything we thought we’d need to build
our own fiberglass water tank. We just barely got in before the barge deadline-
otherwise it would have been 2 weeks before our materials left Vancouver.
The order list looked something like this:
-5 gal West System epoxy resin
-1/2 gal cell-o-fill (filler, so the epoxy thickens and
keeps shape)

-2 gal West System slow epoxy hardener
-20 oz West System micro-fiber adhesive filler (to make the
epoxy more like glue)
-1 pt barrier coat additive
-1 4x8’ sheet marine plywood
-4x28’ roll of fiberglass,

-1 gal Blue Max liquid rubber
-1 pump kit (the pump kit makes measuring epoxy: hardener
much easier—1 pump to 1 pump. I’d highly recommend it, no math, no mess, no
measuring)
-1 resin roller
-1 bag mixing sticks
-1 syringe
-3 paint smoothers (an angled piece of hard plastic like a
squeegee for the epoxy)
-3 deck plates
-3 1/2” plumbing fittings, one leading to the fill up, one
leading to the pump (and then to the sinks), and one as a vent
-various paint brushes, rollers, gloves, masks, paint
thinners, and rags
The dimensions of the tank make an odd looking trapezoid. It is 79” long and
about 18” tall in the front. The aft end is 31” wide at the top and 10” wide at
the bottom. By the forward end, the space narrows to 26” wide at the top and 7”
wide at the bottom. The back is angled and rounded slightly. Including the
baffles, there is about 70 square feet of surface area, and 100 gallons of
volume capacity (if my rusty geometry skills are right).
 |
| About to saw off the tab |
It was like Christmas morning, 5 days later, when our
several palettes of goodies arrived. In the meantime, we had been vigorously
grinding away the old fiberglass to create a nice, smooth surface, including
cutting out and grinding down the two tabs on the hull side. (And that would be the Royal We—John did ALL of
the grinding, and deserves credit for it—fiberglass dust is really pesky stuff)
The basic idea of this tank is to use the infrastructure
already in place as the mould. So the hull on the outer side, the floor on the
bottom, the bulkheads on either end, and the settee support on the inside. By
laying fiberglass over those 5 sides continuously, all we have to add is a top
and some baffles and we have the maximum size tank, with the fewest materials
possible. Theoretically, at least.
So here’s what we did:
Step One- Tabs. make strips of epoxy-hardened fiberglass that
act as supports for the lid. To make them, we laid down a huge piece of plastic
and set 2x4’s down as guides (to keep the fiberglass perfectly straight while
it’s curing). Then we cut strips of fiberglass about 2” wide, slathered some
epoxy down next to each board, laid a strip of fiberglass in the epoxy,
slathered a whole bunch more epoxy over the top, laid a second strip of
fiberglass, another slather of epoxy, and then smoothed it all out. We started
with a paint smoother, then moved to the resin roller to make sure all the air
bubbles were out. Then we had a beer.
Step Two- Funky plywood shapes. The space we are filling with ‘tank’ runs the
length of the settee and the depth from the edge of the bench to the hull. It
extends under the storage compartments that would normally hide behind the back
settee cushions. To waterproof this part of the tank’s “ceiling”, we cut a
funky-shaped piece of marine plywood that –miraculously- fit snuggly in this
“ceiling” space. We fiberglassed the bottom of the board with epoxy mixed with
the barrier coat (to waterproof the epoxy) and hot glued it in place (the hot
glue simply holds it there until it is fiberglassed in place)
 |
| You can see the tabs ready to support the lid |
Step Three- Tabs Again. When the tabs were dry and hard, we scraped and sanded
the excess epoxy off the sides and ends, cut them to fit the four lengths we
needed, and hot glued them in place, so half of it hung over to support the
lid.
 |
| one of the newly filleted corners |
Step Four- Filleting. Fiberglass does not like to bend into
90 degree angles, so we had to get rid of all of them. To do this we made a
witch’s brew of epoxy, hardener, cell-o-fill, and micro fiber filler until it
was the consistency of peanut butter and smoothed it along every edge inside
the tank. It took three coats in some corners to get the angle obtuse enough to
please the fiberglass gods. Then two sessions of concentrated sanding, making
sure every little bump and drip are smoothed out (so we don’t end up with holes
in the fiberglass).
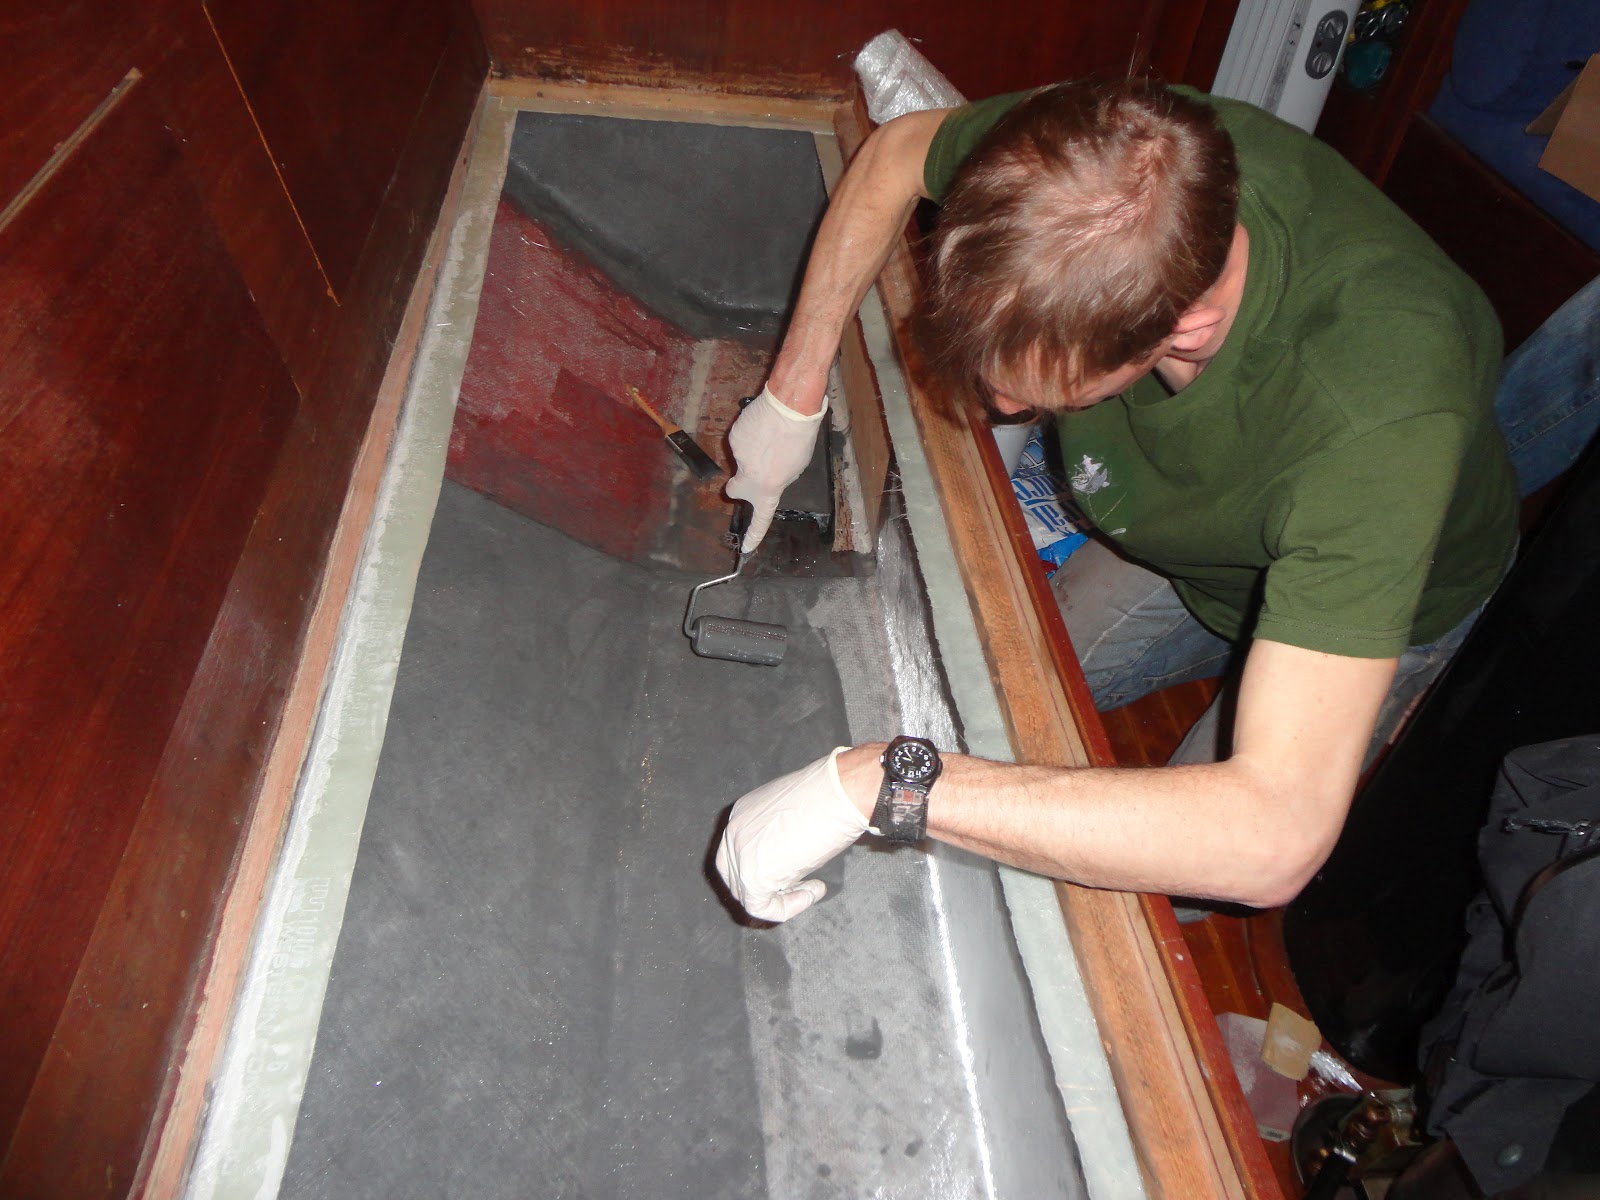
 |
| Here's Matt, rolling on the epoxy |
Step Five- The
Big Step. Matt
came in to assist in this crucial step, where we laid sheets of fiberglass
inside the entire tank and rolled on the barrier coat added epoxy. Finally, the
big gaping hole started to look like a tank!
Because it’s cold and
wet here, and ensuring the
epoxy cures right is the very most importantest step of the whole process, we
plugged in a few electric heaters and covered the whole setup with big blankets
to keep it warm and dry while the epoxy cured.
Step Six- The Lid.
We measured and cut
(and then re-measured and cut a bit more) a piece of marine plywood for the lid of the tank, to fit perfectly inside the frame and rest lightly

on top of the
tabs. Then we fiberglassed
both sides, ensuring the bottom (inside) side had the barrier coat additive.
 |
| rolling out the airbubbles in the epoxy on the l
|
Step Seven- Make Baffles. Baffles are blockades inside water tanks to
baffle the water so the
molecules can’t band together and plan an escape, using
momentum to throw themselves violently from one side of the tank to the other.
In our case, they are 2 pieces of
fiberglass cut to trisect the tank, with several holes to allow the passive
water through. We made them just as we made the tabs, but bigger (epoxied 2
rectangles of fiberglass together for each one, let them cure, and cut them to
fit). We added triangle supports for better structural integrity. Then we used
the same filleting concoction along every touching edge, to glue them firmly in
place.
Step Eight- Break. Take a month off and get married in
Mexico.
 Step Nine- Add view ports.
 We drilled three large strategically placed holes in
the lid of the tank and epoxied the three view ports in place, making sure to
coat the newly exposed wood very well.
The three  ports are centered over each of the three sections created by
the baffles, so we can theoretically reach every corner of the tank to inspect
and clean.
ports are centered over each of the three sections created by
the baffles, so we can theoretically reach every corner of the tank to inspect
and clean.
 Step Ten- Access ports for the view ports.
 We saved the original piece of
plywood John cut out to
rip out the old tank (the ‘seat’ part of the settee),
so we simply cut three squares out to use as “doors” to the newly installed
view ports. We also painted this piece, as it was old and sad looking.
Step Eleven- Plumb. We drilled a ½” hole at the lowest bottomest point in
the tank (where the old tank was plumbed as well) and silicone-d one of the
fittings in place. Once it dried, John hose clamped the flexible piping to the
fitting and teed it into our water system. Then we drilled another hole at the
top of the tank and did the same thing to plumb it to the fill up port on the
deck. The third fitting also leads to the deck, so the water has somewhere to
go in case we overflow the tank.
Step Twelve- Clean. It is up for debate how safe it is to drink out of an
epoxy-covered surface. It seems to me it’s no worse than plastic or metal. But to
minimize the potential effects, we scrubbed the tank really well. With vinegar, then soap, then more vinegar. When
epoxy cures, it secretes a waxy stuff that can taint the water, so the idea is to
scrub as much of that away as possible.
Step Thirteen- Gunky blue stuff. It was recommended to us that we coat the tank
in BlueM
ax liquid rubber. You can check it out
here. It’s pretty cool
stuff, and seemed like a smart addition to the

tank. This was not actually on
the original order, but a friend

happened to have some for a project he hadn’t
yet started, and let us buy it off him. It’s almost the consistency of silly
putty, and the goal
is to slather it on as thick as possible. We used paint
brushes,
but it was more like smearing and pushing than painting. We coated the
entire interior including the baffles and lid, and used exactly 1 gallon.
Step Fourteen- Wait. There is a recommended 2-week curing time for the Blue
Max, so we’re hanging out for now, drinking out of a 5-gallon jug like we have
been for the last year, waiting for the grass to grow. (And the tank to dry).
This waiting time works out well anyway, since we’ve just moved again and are
orienting ourselves with a new job. In the meantime, we have placed the lid in
place, put the settee back together, and sat on that side of the boat again for
the first time in 7 months!
Step Fifteen- Finish! The very last step is to give the tank one more good
scrub, glue the lid in place with epoxy, and fill it up with water.
If you have leaky old aluminum water tanks, I hope this was
helpful. If you have questions or want to talk more about what we did, please
leave a comment- we’re more than happy to share the rest of our limited
knowledge and experience.
If you don’t have a leaky old water tank and are not yet
snoring on your keyboard, sorry for the long-winded somewhat technical ramble.
And I bet you wish you did have a leaky old water tank, so you could grind
fiberglass and smear goop like us
:-)
***UPDATE 7/12: Do not use Blue Max on your fiberglass water tank! It does not stick to fiberglass, but is meant for concrete. I have spent way too many hours with my face jammed against the top of the tank, shoulder distending, fingers stretched to the very corners to "peel blue" from the entire inside of the tank.

 ~We also got a small 10 watt panel and solar controller to
keep our start battery topped up.
~We also got a small 10 watt panel and solar controller to
keep our start battery topped up.